a) they hate their family or
b) they hate the way they look in photos
I can't help you with the feelings of animosity toward your spouse, parents or siblings BUT I can assist you with some tips to look fabulous the next time you get ready for a close-up. And these helpful hints are also useful when preparing for your next photo sess...be it celebrating an engagement, wedding, baby, or pregnancy. Heck, you may be a natural beauty and wanna break into modeling...these will definitely get ya on the right track. So here is a model's guide to photo shoots - these are the basics people...so don't contact an agent just yet.
The examples below are from my own personal file of when I used to
WHAT TO WEAR:

Also, remember that these pictures are FOREVER. This means that you don't neccessarily want to wear what is trendy - wear what is flattering. Clothing that is too tight, too revealing, and too baggy are big no-no's.
In a studio, colors are definitely ok - keep patterns to a minimum and if you must wear something 'non-plain' make it a muted or a non-repeating pattern like this skirt. Also, white shirts can wash you out in a studio (but I love wearing white!) so in order to bring some flava to the mix, add a bright necklace to break it all up.
Makeup should be natural looking. And again - if it ain't flattering, (be Anti-Nike) just don't do it! Ask a stranger if you can't tell. They probably won't lie. TIP - Ask your photographer if you can see one of the first photos to see if your makeup is too dark or too light. Also, keep a small makeup bag and a mirror with you for touchups.
WHAT TO DO WITH YOUR FACE:

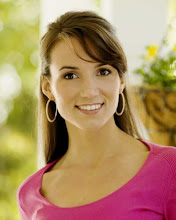
First and foremost, learn your best smile. Practice in the mirror till your facial muscles memorized the movement. Do it with your eyes closed. Smile then open your eyes...what needs to change? Maybe your teeth aren't showing enough, maybe your mouth is too open, maybe you squint your eyes - make the change then do it over and over. Remember, even if you are only in the background, your face is visible so SMILE!
To make your face appear thinner, point your nose directly at the camera lens then lower it 1 to 1.5 inches. This little technique also helps your eyes look bigger and more alert. Try to raise your eyebrows just a hair and pull the facial muscles back and upward toward the crown of your head for a more tight, youthful appearance. For the most complimentary picture, turn your head till your 'good side' eye is the center of the shot.

WHAT TO DO WITH YOUR HANDS:
Your hands are awkard - join the club. Don't know what to do? Pretend you are in character. If you were a cowboy, you'd hook em. If you were a glam gal, you'd relax at the wrist. Still feels weird? Try letting your hands hang down by your side, placing them on the outside of your leg. Or you can pretend you are pinching a fragile glass between your thumb and middle finger.

One last hand tip - keep your fingers together. Otherwise you look like you have a claw.
WHAT TO DO WITH THE BODY:
Shoulders down. Abs in. Head up. Angle one leg or arm toward the corner of your picture. As you can see, one leg to the left bottom corner, one arm to the left top corner. Don't shmoosh your arm on your body - let it hang away...reduces arm fat appearance.

Push the bootie out. It may feel awkward but it makes photos better. Last but not least - put your weight on your back leg and arch your chest out till you feel your abs feel long (no back pain should be included - if that feels tight, relax a bit).
So that's it...once you get your face on, your hair did, and your photog lined up, you should be good to go. Conquer your solo shoot and your family photos should be a cinch. That is, if you can forgive your mother for always criticizing you and your brother for announcing that you kissed the bathroom mirror till you were twelve :)


No comments:
Post a Comment