Thursday, April 30, 2009

Tiling Tips

I'm back with more info from my recent bathroom tiling adventure. And here's a headsup...I am NOT going to talk about how to tile...you guys can google that. I wanna go into some tips to make tiling easier than a call girl. YAY!


TIP #1 - BE LEVEL HEADED (and floored)

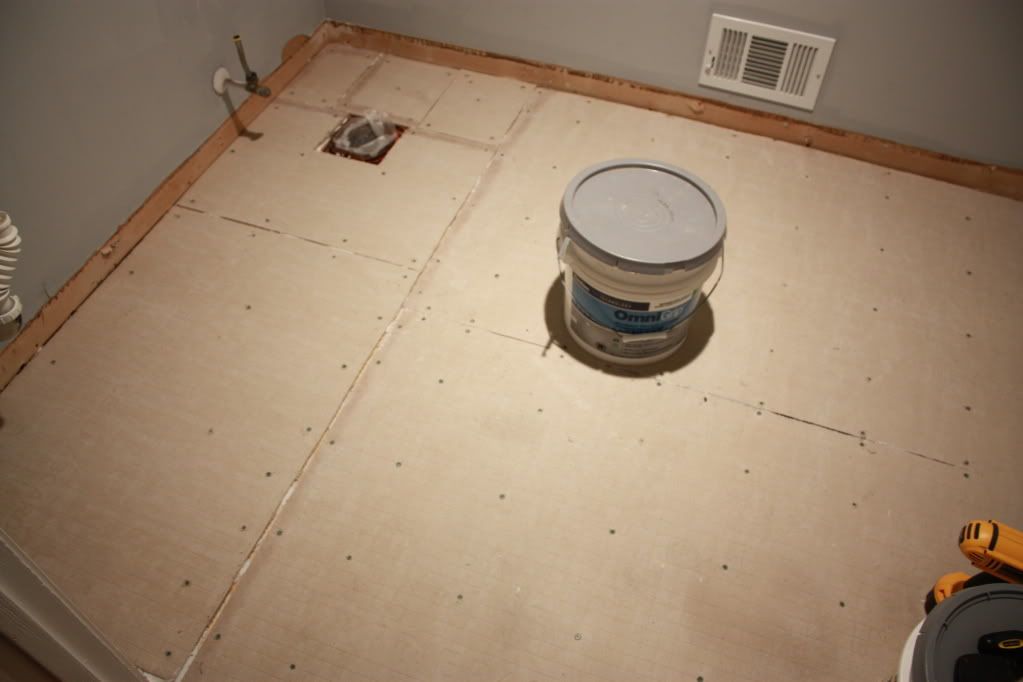
Before our bathroom floor was less level than the tower of Pisa....but now, its a whole new ball game. You can see how we did it here. The even floor makes a world of difference. Not only will the thinset be easier to spread but the actual tile will lay flat instead of having one corner higher. Plus the finishing touches such as trim, doors, furniture, and toilets will go in easier. There is nothing worse than finishing a room only to discover that now the legs on your bathroom cabinet wobble all over. Do the prep people - even out that floor!


TIP #2 - WHOLEY MOLEYS.

Lay out your tile in the room first. Getcha a good plan going. Small adjustments now can save you time & moolah later. See how our room is just a smudgen under the perfect size? Look closely. Our tile is right up to the wall on the left side and leaves just an inch on the right? If I evenly centered the tile in the room (like every website suggested to do) both sides would have required a half inch tile to finish it off. Instead I scooted the plan over to accomodate my inner Britney (It's My Perogative!). It saved me cutting time and the cost of extra tiles!


TIP #3 - PEE YOUR PANTS.

People often try to use a manual tile cutter. If you wanna right shoulder muscle the size of a linebackers & have bazillions of hours...go for it. But me? I like to pee my pants. And you can quote me on that. A wet tile saw is not only easy to use but it will save you TONS of time. Rent one, borrow one, or buy one (we got ours on sale for around $80 and it's been used for six projects already!) whatever you do, just get your hands on one for your next tiling project.


TIP #4 - CLEAN YOUR CRACK.

Let's face it, your crack can get nasty. Stuff is squishing out in the bathroom. The nearby crack is the only place it can go. Wet crack mess can get everywhere. And when it dries, it must be removed or else you end up with negative reactions. So go ahead and scrape it clean. It may hurt your hand, but you will get used to it. I use an assortment of different tools...the key is to dig that hot crack mess out and start with a clean slate :)


TIP #5 - GROUT WITH TWO SPONGES

Spreading grout is super fun. Wiping grout is not. Make the job easier with two sponges and a partner who doesn't mind helping. As you wipe with one sponge, have your partner clean out the other...then switcheroonie. Not only will it make the 'wiping grout' stage easier and faster - but it gives you a flawless finish. Just don't forget to squeeze your squeezer later for a job well done.


TIP #6 - PAINT BEFORE TRIM

Self explanatory. Yes, you will have to caulk and paint your trim but go ahead and get the walls painted before you apply your floor boards. It'll save you time later because you don't have to do a perfect bottom line.


TIP #7 - INVEST IN YOUR THRONE

My older brother (a master plumber in Alabama) recommended to us that we spring for a Kohler brand toilet. He said that in general they have less problems. I figure Pepto Bismol's catchy jingle reminds us of enough potty problems - we really don't need an issue with the potty itself. So we were set on Kohler. We also learned that chair height is comfy for those of us with knee problems. And that the gentlemen folk prefer the elongated bowl. Just so happens that Lowe's carried a Kohler, elongated bowl, chair height toilet for under $200. And let me tell ya, its so comfy I can read an entire House Beautiful on my throne now. I know - I checked.


TIP #8 - DEVILS IN THE DETAILS

You have heard this a million times...devils in the details. It is never more true when you are retiling a bathroom. Sure you may have a totally tubular tiled floor but if the room looks gosh-awful, then nobody can focus on your DIY masterpiece. Go ahead and switch out hardware, touch up paint, include accessories, change your 80's wallplates and finish up your space 100%. It will let your guests dial into your bling-bling floor instead of the blah-blah room.


So there you have it my fine peepers. Some useful tips to help you in your next tiling extravaganza. And if you have some uber helpful suggestions that you would like to share, the floor is yours. I am sure that I am not the only one that could use some more money-saving, time-saving, effort-saving and result-improving tips for along the way. So, just like in the potty room, get to it!

For more bathroom makeover fun, check out Freckles Chick's new loo.

Decoupaged Digits

That's right people. I am putting the swagger back into decoupage with a simple piece of art that you can do right at home. and for CHEAP. Just take a look at my finished result:


Let's say you have a frame that you want to feature a little gender neutral, totally personal, yet still hip work of fantasticalness. And the place you wanna feature this soon-to-be-hotter-than-a-jalapeno frame is not really appropriate for a blownup picture of you in your tankini in Cancun. (Pixels are not my cellulite's friend). SOooo, what's a girl to do?

Decoupage : The ancient art of gluing.

That's right. And the best part about our favorite glue-filled activity (while keeping your nose clean anyway) is that most of the supplies can be found in your home! Here's what you need to get your decoupage on:


Glue
Water
Scissors
Paper (or magazines or photos or whatev)
Something to stick your cutouts to (in my case, a piece of foamboard)
Paint, glitter, a pinch of love (optional)
Brush (or sponge or fingers)

First, cut out whatever little doodad you wanna paste down. Let's say you are making a Britney montage. Cut out a pink wig, a sign of Cedars Sinai, a microphone, a Cheetos logo, and a chubby Kev-dogg. Also include a picture of fireworks...cause you know, like a firecracker she makes it hot.


Personally, I chose some numbers that were near and dear to my heart. 1435. I printed them out in Word. And went to town with my nearest scalpel. Just call me Meredith Grey.


Then I mixed some water, elmer's glue, and some yellow paint. I added water till I got at the consistency I wanted...and brushed it all over the foam board...then laid the cutouts on top and gave it another good wiping or two. Pretend you are Nicole Kidman...on the beach...spread generously. The key to making the "old" look is to vary the colors...a little more brown in one wipe, a little more white in another.


The best part is that this piece of art incorporates some other existing art in my room! And you can personalize yours to do the same. In our kitchen was a yellow sea fan...but it was all by its lonesome in the hue department. Bringing in another piece of sunshine was just the ticket to make the yellow really pop. Plus, the frames in the kitchen hide outlets...no more wall acne!

Wanna get some digits? Cause you know you are lovin the numbered fun...Here is some inspiration.


So how bout you? Do you decou? What have you glued lately? Got digits in the house? And if you were to do this art, what numbers would you choose and why? Would they be your birthday - cause of the personal historic significance? or maybe your name is Jenny and you like 8675309 :) I think I just aged ten years.

Mission : Demolition

Demolition is my favorite part of any project. Somehow there is something very theraputic about tearing out trim or cabinets or removing gross stuff. It's like I have house bulimia. And when the cockroach poo has fallen in my open mouth, I actually consider daily purging. The point is...demo is disgusting. And freakin' awesome.

So if you wanna attempt a project, don't let someone take the demo away from you. It might be just the thing to release the pent up frustration that builds from dealing with your physician who insists that chocolate is not a major food group.

Now let's look at the de-construction of my first floor bathroom.


We start with a normal bathroom. My flooring before went a little something like this:
The joists in your house are beams that hold up the floor, roof, or ceiling. They are important - do not mess with them during a bathroom tile job. Otherwise, the results are like Britney-with-an-umbrella, if you know what I mean.

On top of the joists come the subfloor. Yes, made of plywood. This is usually nailed directly to the joists and most importantly, needs to be dry. Why does it need to be moisture-free? Mold. Mildew. Wood rot.

Next comes the glue or adhesive that is holding the lineoleum down. If it is old then the lineoleum is ridiculously hard to remove. If it is new, it should come up pretty quick.

After the lineoleum is the trim...usually a 3" to 5" nailed board on the wall with a piece of quarter round finishing the look of the floor. Ours was partially made of pine, partially partical board...aka cheap...so it splinters upon removal. You have to remove the trim to remove ALL of the lineoleum. So obviously that is where I started.


After the trim was off (yuck), I tried peeling up a corner of the lineoleum. Hallelujah - it came off easily. Fortunately for us whoever laid the lineoleum let the glue dry a little too long before putting on the actual floor. The lineoleum wasn't even sticking. Basically the only thing holding it down was the trim and a few square feet where the glue did it's job.

Unfortunately I discovered some issues. Take a look:


Swirlies were no problem. The paper could be scraped up using my handy dandy joint compound knife. The water damage was quite old and the subfloor did not suffer any damage from mold, mildew or rot. Whew. My only issue was the joint compound on the floor. I called my mom. She said that in older homes people sometimes used jc or plaster to 'level' the floor. Obviously in my home, they didn't do a good job...only 3/4 of the room was covered...the other quarter was obviously lower. So I did my homework.

I found that you can apply mastic or thinset to the clean floor before fastening your Durock (or backerboard). Some people skip this step & fasten the board directly to the subfloor. But in our case, the thinset made sure our new tile foundation was completely level. But back to that in a second.


So I scraped, swept, cleaned and prepped the floor. When all the extra glue, paper, lineoleum and dirt was hauled off, I brought in the big guns to remove the toilet. Turn off water. Unscrew bolts. Lift toilet. Pretty easy right. My boyfriend and I hauled it to the garage.


The toilet hole got some press-n-seal to keep that stank down. And I finally got behind the toilet to sand the rough wall behind the tank.


I also took this opportunity to get rid of a couple squeeky floorboards. I fastened the floor down to the joists with a couple screws...and just like Trump, I said "Not another squeek or you're fired!".

The photo on the right shows me marking my tile line. As you can see the old lineoleum went right up to the hallway hardwoods. But our new tile would only be in the bathroom. We needed to extend the hardwood by adding a few additional pieces and then the finishing touch would be a threshold stained to match the hall.


Then came my floor leveling event via thinset. Spread with a notched trowel. Then take your backerboard and lay flat on the thinset. Press down until level.


Then screw er in. The fine folks at your local home improvement center will hook you up with all the proper equipment.

Speaking of equipment - here are my top 6 bathroom demolition tools (so girls, make sure you have one of each in your pink tool belt (or within reach) the next time you rip out your loo):

So there you have it. One prepped and ready to be tiled bathroom. Demolition mission complete. Yeah, my next mission (if I choose to accept) may be suspending over a temperature, motion, and pressure sensitive room to get a NOC list...or I might leave that to the amatuers :)

Wednesday, April 29, 2009

Spring into Summer

Does the thought of summer make you wanna change up your home decor? Yeah. me too!

During the spring months, my palatte starts craving fun colors, sheerer fabrics, and oddly enough, strawberry fruit rollups. And at 50 calories a pop with no known side effects for eating the entire box, it is just the start of a beautiful summer experience.

Speaking of sweet experiences, this is the year for brightening up my home. I wanna feel easy going and casual. I wanna feel lighter than Posh Spice. I wanna walk in the door, kick off my flips, and wear shorts again. That is the feeling that inspired a little story. This story of summery transformation begins with a $3.50 placemat find at the Pottery Barn outlet.

And this is how it motivated an entire couch redo in funner colors (kinda like when fruit rollups went from only in red to swirly hues!):


Our fall/winter pillows are super fun right? I still adore that chocolate/green color combo especially with that graphic brownie-on-top-of-my-sundae pillow smack dab right in the center. But on the down side, it definitely gave off a cooler month vibe. Not exactly a swim-inspired look....unless those colors were on a VS model....they could make some pocket lint, a key ring, and a post-it-note look like a bathing suit. grrr.


And now my pillows are funner than a bunny farm! I am loving the combination of the navy with the pale turquoise and spring time green. Plus the trio of graphic prints and the various fabrics give the couch visual & textural interest. And the sheer number of pillows comes in handy come kanoodle time. Wahoo!


So how did we start with a placemat and end up with a summery couch? I am so glad you asked. A+ for you and one thousand points for excellent inquiry skills.

The little accent pillow is actually a placemat. You know - one of those things that sometimes makes it onto the table under the paper plate only if company is coming? Just ripped open the seam where the front layer meets the back layer. Two inches will do ya. Then just stuff that hole like you are on week 6 of Survivor. Hand stitch the sucker closed and BADA BING! An accent pillow!


I actually considered attempting to sell this sucker back to Pottery Barn to see if they would give me more money since pillows cost more than placemats. But God would be watching. Also, I am quite sure that Pottery Barn could trace my credit card and I would like to continue shopping there in the future. But the point is, this little piece of summery heaven looks a heck of a lot more expensive than $3.50. And since I chose a pillow with several colors, all I had to do was mix and match pillows till I found a combo that screamed "POOL PARTY!"


So are you changing your home decor for the warmer months? How do you do it? Are you a pillow-switcher or a slipcover & go kinda peep? I hear that drapes make a springtime switch...although I have never done it. Have you ever made a placemat into a pillow? Please share. Oh and if you guys wanna attempt this project at home - be sure that you get a placemat with two layers. Otherwise you will end up with one ripped piece of fabric and fiber fill all over your sofa...and I can think of other things that are cooler :)

Tuesday, April 28, 2009

Secret Project Reveal

Remember all the clues? Yeah, the clues I gave you about the secret project I have been diligently working on? Right. Those clues.

Well, I am ridiculously ready for this grand reveal. But first let's review the before:


Before it had lineoleum flooring. yes. It was gross. Sure, it didn't look gross in pictures but trust me...it was. In fact, it was the same flooring that continued into our kitchen before we ripped it out and laid hardwood. Which actually added to our problem. The hardwood was 3/4" higher than the linoleum...trip city (and I ain't talking about McConaughey's bongo). Oh and did I mention it was ripped?


Under my new bathroom cabinet was a giant gash. Everytime we swiffered, the snag would cling to dirt like Madonna to her yoga mat. Eventually the buildup was disgusting. Note the grossness in the corner...eww. So naturally it needed a makeover.

Enter moodboard options:

Obviously the tile choice had to go with my existing paint color (because I love it) and my white beadboard cabinet and the flooring in the hall (which it meets up to at the door). The first option was my favorite of the tiles...bring on the hexagon! But the priciest of the options as well. Three times the cost of the others and not appealing to all future buyers.

Option 2 was the most standard option being a porcelain ceramic tile. Since it was uber durable, this would definitely hold up well and still bring a light feeling into the room. Affordable, appeals to the masses and still brought warmth into the space. Obviously the least creative option as well.

Option 3 was a dark slate tile that would pick up the blues on the walls. Dramatic, enduring and also appeals to the masses. However the blue undertoned color might give the room a stark feel (no natural light + blues everywhere = ultra cool...and when I say "cool" I mean "not inviting" instead of "awesome like Blossom".)


After a quick consult with my boyfriend, we went with Option 2.


We picked out a couple options that 'spoke to us'. I liked the english muffin tile - lighter colored with tons of nooks and crannys. Jeremy like the bagel - smooth, warmer colored and little variations. I won.

What really sealed the deal was the fact that we had leftover white grout from our kitchen backsplash project. And white went better with the lighter beige tile than the darker beige or the slate.

So now that you know what we chose, let's get to the reveal. Afterall, my bathroom is screaming like Speidi - "I AM READY FOR MY CLOSEUP!"


Wonder what we did? Ok. Here's a recap:


Wanna know the best part? I did 90% of the work all by myself. GIRL BOWER POWER! My dear husband did change the door hardware and trimmed the bottom of the door (which I could have done) and he helped me lift the old toilet off and put the new one on (which I could have done with another girl) and he carried the sink out to the kitchen (which I could have done with another girl) and he screwed in the toilet bolts (which I could have done). I am saying that I could have done this not because I am ridiculously competitive at times (which is true). I am sayin' it because you women COULD DO THIS! Believe me...I am slightly above a down syndrome intelligence level. If I can do it....you can do it better.

Ok - back to the bathroom. I have tons of photos & info to share from this bathroom redo (including the budget breakdown) so if you wanna see all the details - stay tuned!

Monday, April 27, 2009

15 Under 50

No, this isn't some post about the 15 hottest celebutards under the hill. This one is for my Atlanta peeps (but don't worry, if you are from somewhere else, this can be a good reference tool for you too!). Yes, my fine friends, here is my new latest Bower Powerful tool to help out you penny pinchers. It's called 15 under 50.


All you gotta do is click on the 15 under 50 button on the sidebar and it will take you to a Photobucket slideshow that contains this weeks top 15 Craigslist finds under 50 dollars. I plan on updating that weekly (but just like Britney's virginity promise, you can't hold me to it).

So let's just say you see something utterly fantastic - (or at least has fantastic potential) like this:


or these:


well, then pause the slideshow. Then run your mouse over the photo of the lovely desired item and above the said photo will appear the "GET LINKS" link. Click it and it will take you to the craiglist link....so you can actually buy it!

And for those of you that live outside of the great Peach state...too bad soo sad. SIKE! This is a great reference tool for you too! See something you like, then go scour your own local craigslist. Not only does it give you a price point but it gives you negotiating power with the seller.

Plus, I make notes on each photo - ways I would use it or things to redo or what style it would work with. So if you see something similar to that item lurking in your basement or stored in your attic, you immediately have some ideas on how to reuse, recycle, or repurpose! And isn't that the best way to be green?!?!

One stipulation...if you find something off of 15under50 and redo it, you must pinky promise me that you will send me befores & afters. Because you know there ain't nothing I love more than making over cheapo finds!

Friday, April 24, 2009

Renovation Nation: Kristina's Krib

When I saw Kristina's master bedroom renovation, my jaw dropped faster than Michael Phelps can light up swim. Here is her letter:

You are fantastic and I love reading your blog everyday. I wanted to pass along my before and after pics of our bedroom. Started off a lovely builder white, with mismatched everything. I'm sort of embarrassed to submit the before picture, but I think it's important to see the transformation. I was totally inspired by your bedroom and when I saw the floor to ceiling drapes, I knew I had to do it.

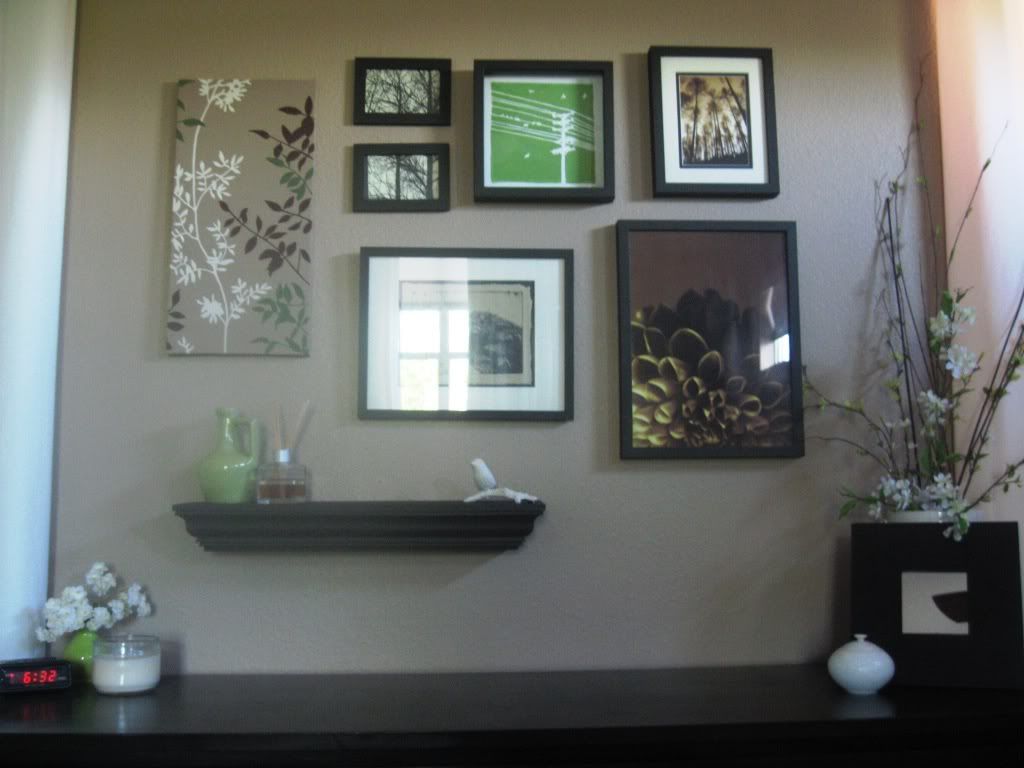
I did most of it on the cheap. Our bedroom furniture was bought for us from IKEA (MALM series in medium brown) I started to hate it, so I primed, painted and polyacrylic-ed it a Espresso color. All of the bedding was pieced together from different stores (I got everything on sale, even the sheets!) and the "cluster" (framed pieces) above the dresser was all hand made by me with the exception of the bird

piece. I bought the roller shades at Walmart for $3.45 and covered them in a off white fabric for a more finished look.

I truly appreciate you sharing your ideas. Keep up the good work! Kind Regards, Kristina


Here is the hot mess before:


And the uber-chic after:


Can you believe that she redid all that furniture?!? Uber-freakin-amazing. I am drooling over the green/eggplant color combo....seriously a ten. and those drapes give the room a miracle makeover. Before the room was a Susan Boyle picture. Now the room is a Susan Boyle cd. You know what I mean. For more info on how Kristina joined the renovation nation, check out her blog tour-de-room.

And if you wanna share your hot-mess-turned-supermodel room, email me the pics pronto! You know it puts the swag in my step, the nanners in my pudding, and the eww....that last one sounded gross.